If you have installed WordPress locally, you will usually access your projects via the localhost. For example http://localhost/wordpress or if you´re using WordPress MultiSite http://localhost/wordpress/project/.
You can learn about installing WordPress locally through our guide on How to Install WordPress Locally.
This works fine, but it would be even better if we could use a specific domain name for each project. That way we could access our local WordPress installs via http://wordpress.dev or any other name of your choice.
Luckily that is quite easy to set up by creating Virtual Hosts with multiple IPs in Apache.
Virtual Hosting
Virtual Hosting can be done in the following two ways:
- IP-based – virtual host with multiple IPs, each for a different site.
- Name-based – virtual hosts with multiple server names running on each IP address.
Apache is one of the first servers to use Virtual hosting techniques. It uses both IP-based and Name-based methods.
Name-based virtual hosting is a technique that uses many different hosts that can share the same IP address. Therefore, name-based virtual hosting releases the burden on the demand for scarce IP addresses.
Virtual Hosts with multiple server names have the added benefit of saving costs. With the help of name-based virtual hosting, multiple sites can run on the same machine, and therefore, work becomes more manageable. This will make WordPress multisite on localhost simpler.
To set up Virtual Hosts and start using your own unique domain names, follow this detailed tutorial: How to Set Up Virtual Hosts Using WAMP.
In order to create unique domain names using virtual hosts, follow through with this guide! The guide will describe to you step by step process of choosing a domain name using virtual hosts.
Create Unique Domain Names using Virtual Hosts
Apache is one of the most commonly used Virtual Host Servers in the whole world. It is easy to set up and configure and, hence, quite easy to use for creating and choosing domain names. The simple procedure is provided for you in the following steps.
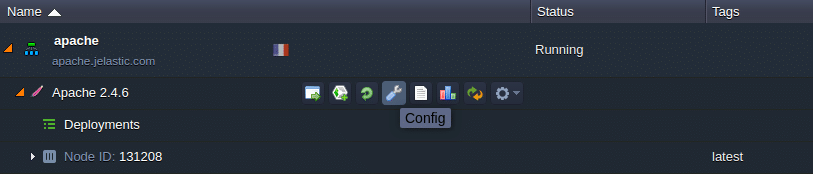
- Start off the process by clicking open the Apache Server application on your PC.
- In the environment visible, click the Config button.

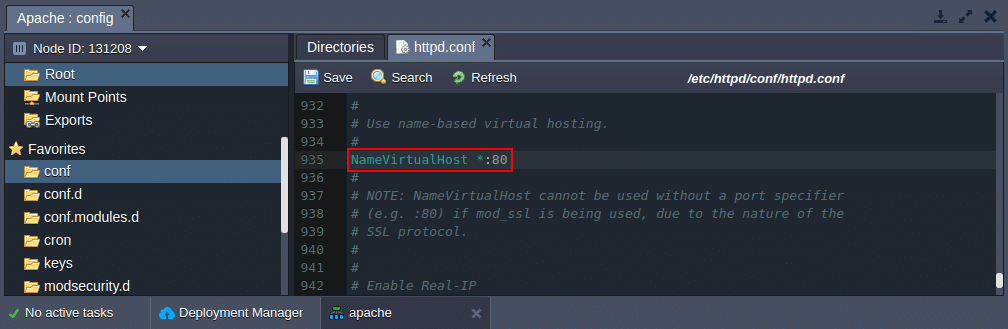
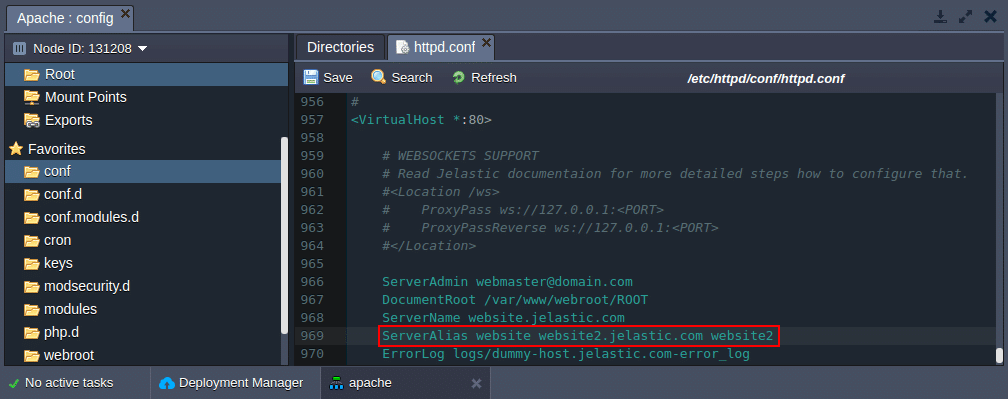
- Find and Navigate the highlighted file path given here: /etc/httpd/conf/httpd.conf
- A prerequisite to begin configuring the virtual host is to ensure that the NameVirtualHosts line is not commented.
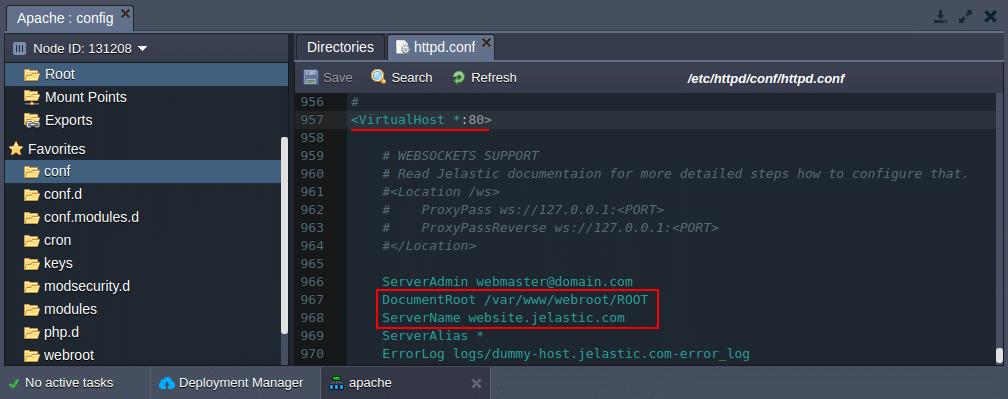
- Moving on to the next, find the < VirtualHost > block in the file code. Here it is important to remember that you must create < VirtualHost > blocks separately for each different host that is likely to be served.
- In case you would like many servers to be accessible by two or more names, make sure you use the ServerAlias directive. This must be placed inside the < VirtualHost > block. Here you can create and use all the good names for a website as you like. Wildcard characters such as “*” or “?” while entering the names.
- There are many other directives that can be used in the scope of the < VirtualHost > block to tune the configuration.
For more details, you can go through the article on Name-based Virtual Host in Apache.
Looking for related articles? Here’s one we recommend: Cloudways vs Kinsta [Which is Better?]
How to edit the host file in Windows 7
To use Virtual Hosts, you will need to edit the Windows host file. On Windows 7, editing the host file requires a few extra steps.
- Open the folder
Start > All Programs > Accessories - Right-click on the Notepad entry and select
Run as administrator - In Notepad, choose
File > Openand selectAll Files (*.*)from the dropdown menu in the dialog box - Browse to the directory
C:WindowsSystem32driversetcand open thehostsfile - Edit and save the file
That is not all. You will see that Windows 7 saved the file as a text file (.txt), even if we choose to save it without the text extension. Let´s change that.
- Make sure you´re still in the
C:WindowsSystem32driversetcdirectory - Press the
altkey - In the top menu, select
Tools > Folder Options > Viewand untick the boxHide extensions for known filetypes - Rename the
hosts.txtfile tohostswithout the extension
Tips, tricks, and troubleshooting
- You should not forget to update the WordPress Address and Site Address in the Settings panel, in case if you already own a WordPress multisite on localhost.
- In case if you get the following error message: “You don’t have permission to access / on this server” – this solution might be of help to you, by helping you achieve WordPress multisite on localhost easily.
- To understand how to know your domain name is good and choose professional domain names, go through the comprehensive guide on How to Choose the Best Domain Name. This will not only help your query of “help me name my website” but will also provide good names for a website.
- To determine a domain name, it is advisable to check whether it is available or not. You can do this here.
The following can serve as a guide to choose domain names.
Looking for related articles? Here’s one we recommend: Cloudways vs Siteground [Which is Faster?]
Conclusion
This concludes the short but precise guide to choosing a domain name using Virtual Hosts. As is evident by the content of the article, the process of creating unique domain names using virtual hosts is quite simple and easy to follow. If you follow this step-by-step approach in the prescribed manner, you will encounter no difficulty. You only need to make sure the sequence is followed and you will be good to go!
Do check more guides on Web Hosting. A few of them are mentioned here:
")
")

